How do you make a DRM video
2025-04-19
What is DRM?
DRM, or Digital rights management is the management of legal access to digital content [1]. In short, these are technologies that prevent us from recording and distributing copyrighted contents. Multiple big companies are developing their way of distributing contents based on this technology such as Apple (FairPlay), Google(Widevine), Microsoft(PlayReady), and more...
Quick Overview
This blog will solely focus on DASH (DASH Adaptive Streaming for HTML). We will make a DRM video with adaptive bitrate using ffmpeg, and shaka packager and shaka player for streaming where the player switches between resolutions based on network conditions.
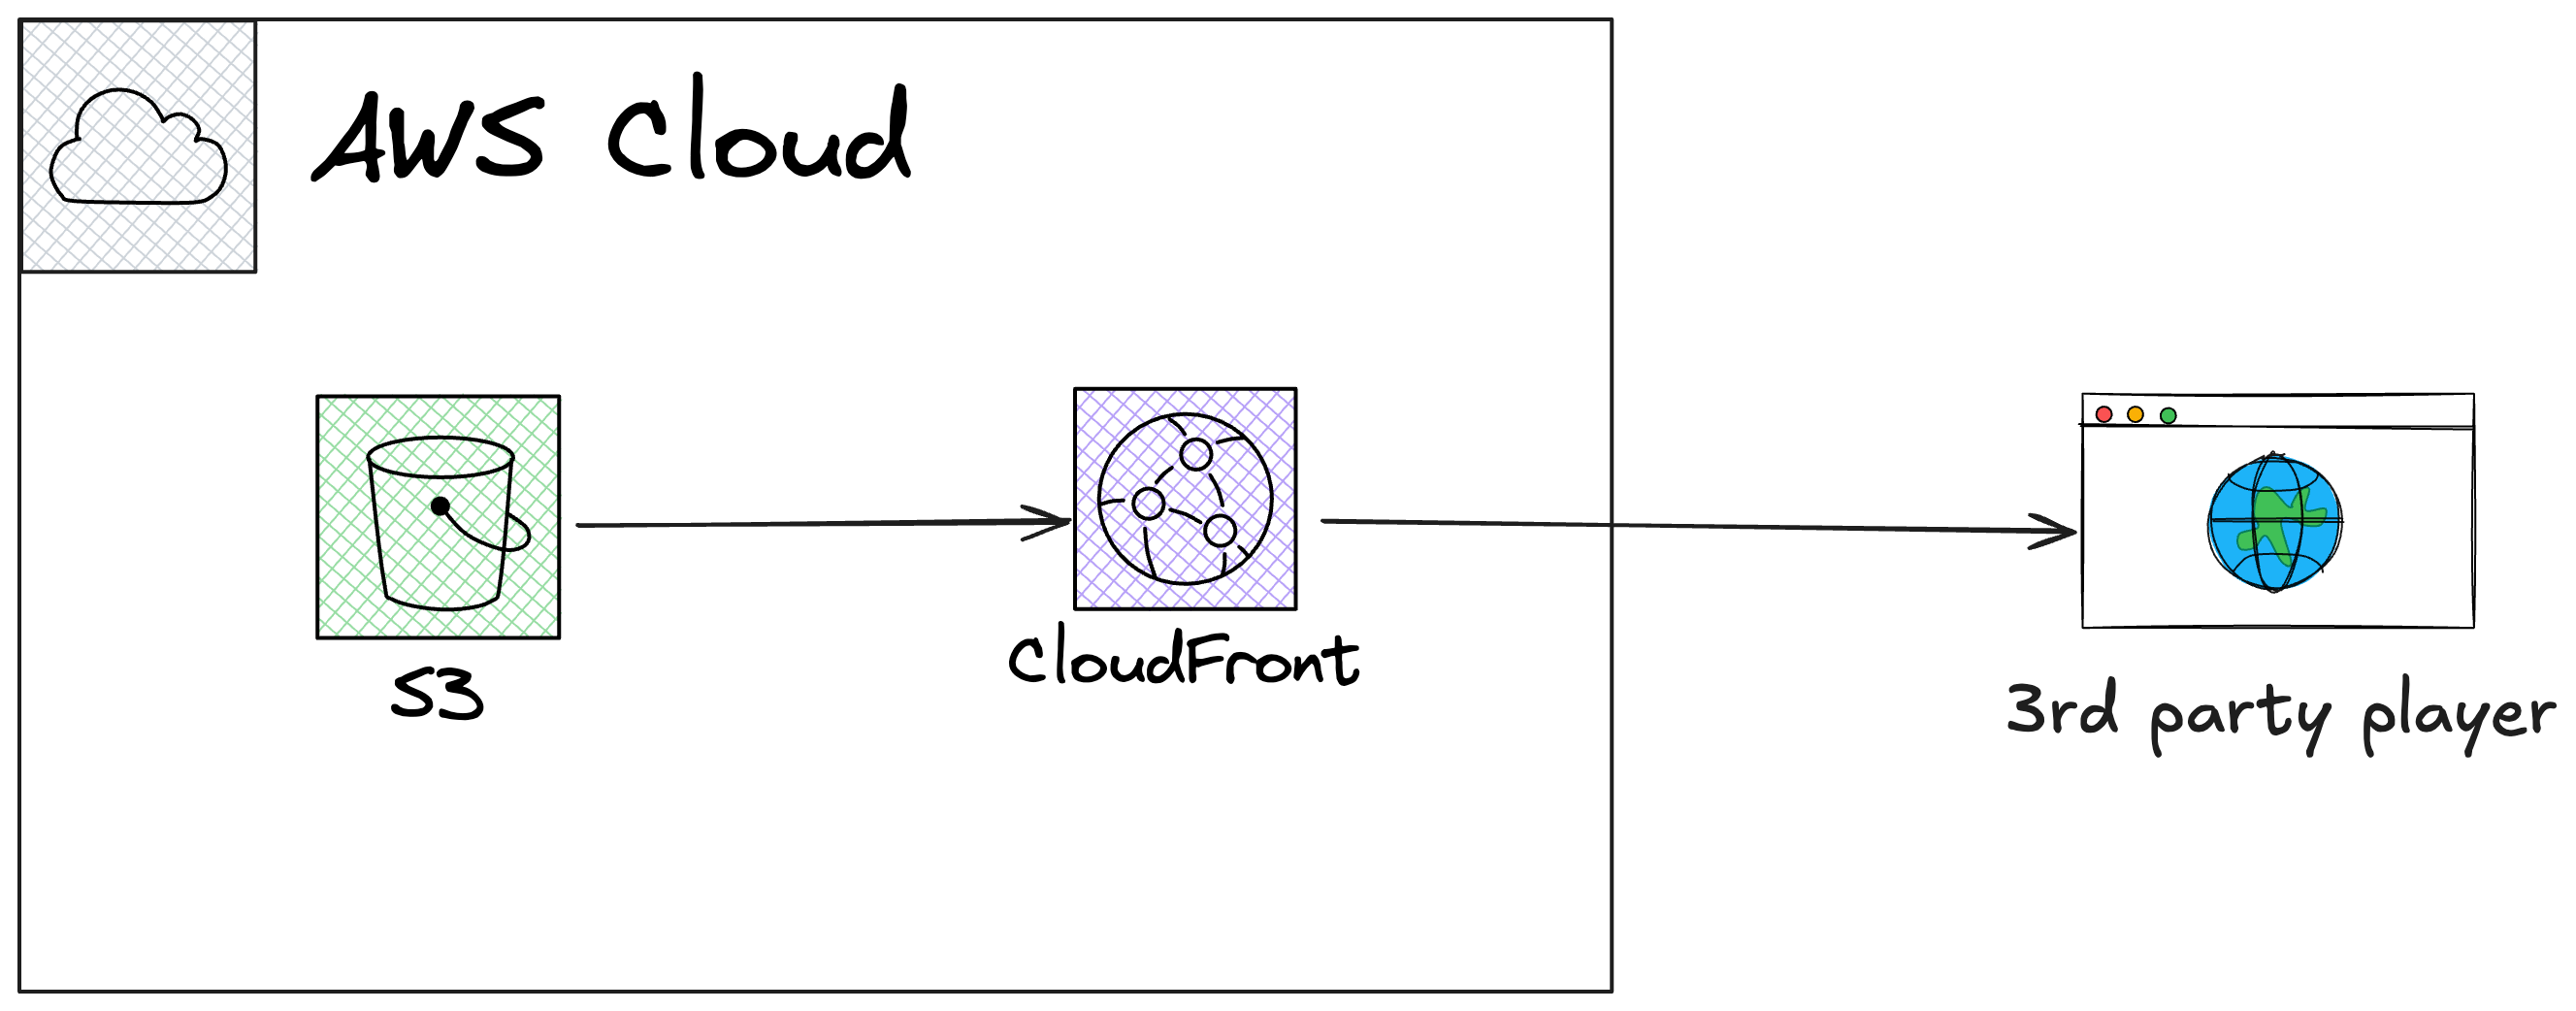
Architecture
Step 1: Encode the video
Shaka Packager does not do transcoding internally. The contents need to be pre-encoded before passing to Shaka Packager.
Let's say we have a 1080p original content original.mp4 containing AAC audio, 24 framerate. We want to encode the contents into four resolutions: 360p, 480p, 720p and 1080p.
We will use ffmpeg which is a popular tool used for transcoding.
First let's check the video metadata
ffmpeg -i original.mp4 -f null -
The command above is use to get info of the video without generating any output file. See https://trac.ffmpeg.org/wiki/Null.
ffmpeg version 7.1.1 Copyright (c) 2000-2025 the FFmpeg developers
  built with Apple clang version 15.0.0 (clang-1500.1.0.2.5)
  configuration: --prefix=/opt/homebrew/Cellar/ffmpeg/7.1.1_1 --enable-shared --enable-pthreads --enable-version3 --cc=clang --host-cflags= --host-ldflags='-Wl,-ld_classic' --enable-ffplay --enable-gnutls --enable-gpl --enable-libaom --enable-libaribb24 --enable-libbluray --enable-libdav1d --enable-libharfbuzz --enable-libjxl --enable-libmp3lame --enable-libopus --enable-librav1e --enable-librist --enable-librubberband --enable-libsnappy --enable-libsrt --enable-libssh --enable-libsvtav1 --enable-libtesseract --enable-libtheora --enable-libvidstab --enable-libvmaf --enable-libvorbis --enable-libvpx --enable-libwebp --enable-libx264 --enable-libx265 --enable-libxml2 --enable-libxvid --enable-lzma --enable-libfontconfig --enable-libfreetype --enable-frei0r --enable-libass --enable-libopencore-amrnb --enable-libopencore-amrwb --enable-libopenjpeg --enable-libspeex --enable-libsoxr --enable-libzmq --enable-libzimg --disable-libjack --disable-indev=jack --enable-videotoolbox --enable-audiotoolbox --enable-neon
  libavutil      59. 39.100 / 59. 39.100
  libavcodec     61. 19.101 / 61. 19.101
  libavformat    61.  7.100 / 61.  7.100
  libavdevice    61.  3.100 / 61.  3.100
  libavfilter    10.  4.100 / 10.  4.100
  libswscale      8.  3.100 /  8.  3.100
  libswresample   5.  3.100 /  5.  3.100
  libpostproc    58.  3.100 / 58.  3.100
Input #0, mov,mp4,m4a,3gp,3g2,mj2, from 'original.mp4':
  Metadata:
    major_brand     : isom
    minor_version   : 512
    compatible_brands: isomiso2avc1mp41
    encoder         : Lavf59.27.100
  Duration: 00:02:42.19, start: 0.000000, bitrate: 1221 kb/s
  Stream #0:0[0x1](und): Video: h264 (Main) (avc1 / 0x31637661), yuv420p(tv, bt709, progressive), 1280x720 [SAR 1:1 DAR 16:9], 1085 kb/s, 29.97 fps, 29.97 tbr, 30k tbn (default)
      Metadata:
        handler_name    : ISO Media file produced by Google Inc.
        vendor_id       : [0][0][0][0]
  Stream #0:1[0x2](und): Audio: aac (LC) (mp4a / 0x6134706D), 44100 Hz, stereo, fltp, 127 kb/s (default)
      Metadata:
        handler_name    : ISO Media file produced by Google Inc.
        vendor_id       : [0][0][0][0]
Stream mapping:
  Stream #0:0 -> #0:0 (h264 (native) -> wrapped_avframe (native))
  Stream #0:1 -> #0:1 (aac (native) -> pcm_s16le (native))
Press [q] to stop, [?] for help
Output #0, null, to 'pipe:':
  Metadata:
    major_brand     : isom
    minor_version   : 512
    compatible_brands: isomiso2avc1mp41
    encoder         : Lavf61.7.100
  Stream #0:0(und): Video: wrapped_avframe, yuv420p(tv, bt709, progressive), 1280x720 [SAR 1:1 DAR 16:9], q=2-31, 200 kb/s, 29.97 fps, 29.97 tbn (default)
      Metadata:
        handler_name    : ISO Media file produced by Google Inc.
        vendor_id       : [0][0][0][0]
        encoder         : Lavc61.19.101 wrapped_avframe
  Stream #0:1(und): Audio: pcm_s16le, 44100 Hz, stereo, s16, 1411 kb/s (default)
      Metadata:
        handler_name    : ISO Media file produced by Google Inc.
        vendor_id       : [0][0][0][0]
        encoder         : Lavc61.19.101 pcm_s16le
frame= 4063 fps=4023 q=-0.0 size=N/A time=00:02:15.56 bitrate=N/A speed= 134x   [out#0/null @ 0x600002898240] video:2087KiB audio:27940KiB subtitle:0KiB other streams:0KiB global headers:0KiB muxing overhead: unknown
frame= 4858 fps=4030 q=-0.0 Lsize=N/A time=00:02:42.09 bitrate=N/A speed= 134x
Great, we have two streams. The first one is a H264 video and the other one is AAC audio.
Now we encode the video to all 4 different resolution. This is not a must but multibirate content is recommended. And ensure we have a right video encoding requirement for Shaka packager.
# 360p
$ ffmpeg -i original.mp4 -c:a copy \
  -vf "scale=-2:360" \
  -c:v libx264 -profile:v baseline -level:v 3.0 \
  -x264-params scenecut=0:open_gop=0:min-keyint=72:keyint=72 \
  -minrate 600k -maxrate 600k -bufsize 600k -b:v 600k \
  -y h264_baseline_360p_600.mp4

# 480p
$ ffmpeg -i original.mp4 -c:a copy \
  -vf "scale=-2:480" \
  -c:v libx264 -profile:v main -level:v 3.1 \
  -x264-params scenecut=0:open_gop=0:min-keyint=72:keyint=72 \
  -minrate 1000k -maxrate 1000k -bufsize 1000k -b:v 1000k \
  -y h264_main_480p_1000.mp4

# 720p
$ ffmpeg -i original.mp4 -c:a copy \
  -vf "scale=-2:720" \
  -c:v libx264 -profile:v main -level:v 4.0 \
  -x264-params scenecut=0:open_gop=0:min-keyint=72:keyint=72 \
  -minrate 3000k -maxrate 3000k -bufsize 3000k -b:v 3000k \
  -y h264_main_720p_3000.mp4


# 1080p
$ ffmpeg -i original.mp4 -c:a copy \
  -vf "scale=-2:1080" \
  -c:v libx264 -profile:v high -level:v 4.2 \
  -x264-params scenecut=0:open_gop=0:min-keyint=72:keyint=72 \
  -minrate 6000k -maxrate 6000k -bufsize 6000k -b:v 6000k \
  -y h264_high_1080p_6000.mp4
For what these params do, please refer to ffmpeg official documentation.
This step will output 4 videos h264_baseline_360p_600.mp4, h264_main_480p_1000.mp4, h264_main_720p_3000.mp4, and h264_high_1080p_6000.mp4.
Step 2: Create a DRM video
The preparation is done. Now we're going to download the Shaka packager by going to https://github.com/shaka-project/shaka-packager/releases and grab the latest release. I'm on a Mac so I'll take the packager-osx-arm64. If you're on Windows, you might want to grab packager-win-x64.exe.
wget https://github.com/shaka-project/shaka-packager/releases/download/v3.4.2/packager-osx-arm64
After that remember to allow it to execute or you will get a permission denied error.
chmod +x ./packager-osx-arm64
Now use the packager to create DRM video.
$ packager \
  in=h264_baseline_360p_600.mp4,stream=audio,output=audio.mp4 \
  in=h264_baseline_360p_600.mp4,stream=video,output=h264_360p.mp4 \
  in=h264_main_480p_1000.mp4,stream=video,output=h264_480p.mp4 \
  in=h264_main_720p_3000.mp4,stream=video,output=h264_720p.mp4 \
  in=h264_high_1080p_6000.mp4,stream=video,output=h264_1080p.mp4 \
  --enable_widevine_encryption \
  --key_server_url https://license.uat.widevine.com/cenc/getcontentkey/widevine_test \
  --content_id 7465737420636f6e74656e74206964 \
  --signer widevine_test \
  --aes_signing_key 1ae8ccd0e7985cc0b6203a55855a1034afc252980e970ca90e5202689f947ab9 \
  --aes_signing_iv d58ce954203b7c9a9a9d467f59839249 \
  --mpd_output h264.mpd
Here is the test crendential used in this tutorial.
key_server_url:
https://license.uat.widevine.com/cenc/getcontentkey/widevine_test

signer:
widevine_test

aes_signing_key:
1ae8ccd0e7985cc0b6203a55855a1034afc252980e970ca90e5202689f947ab9

aes_signing_iv:
d58ce954203b7c9a9a9d467f59839249
The test credential is only meant for development. Please reach out to Widevine if you need something for production use.
For production DRM, you will need to establish a contract with a DRM provider and configure your own secure license server. This tutorial uses a test server for demonstration purposes only.
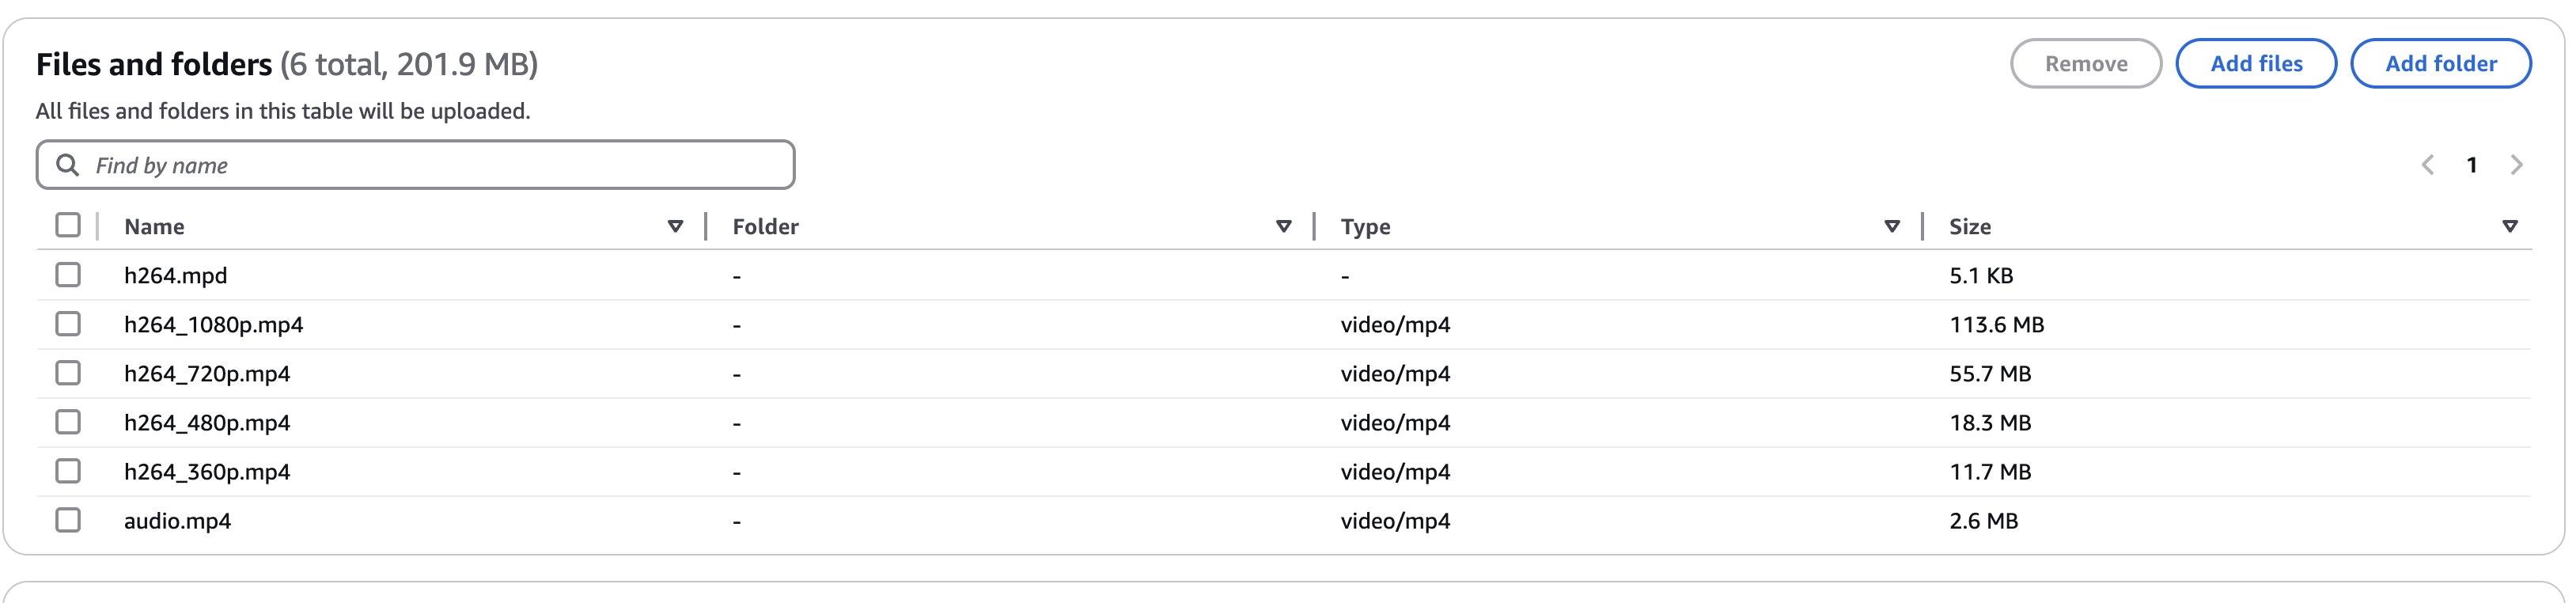
The above packaging command creates five single track fragmented mp4 streams (4 video, 1 audio), and a manifest (mpd file), which describes the streams.
You can quickly check if the packaging process created valid fragmented MP4 files by trying to preview one of the .mp4 streams locally. This preview does not mean the DRM is working yet, but confirms the basic file structure is correct. Because this can only be tested on Shaka Player.

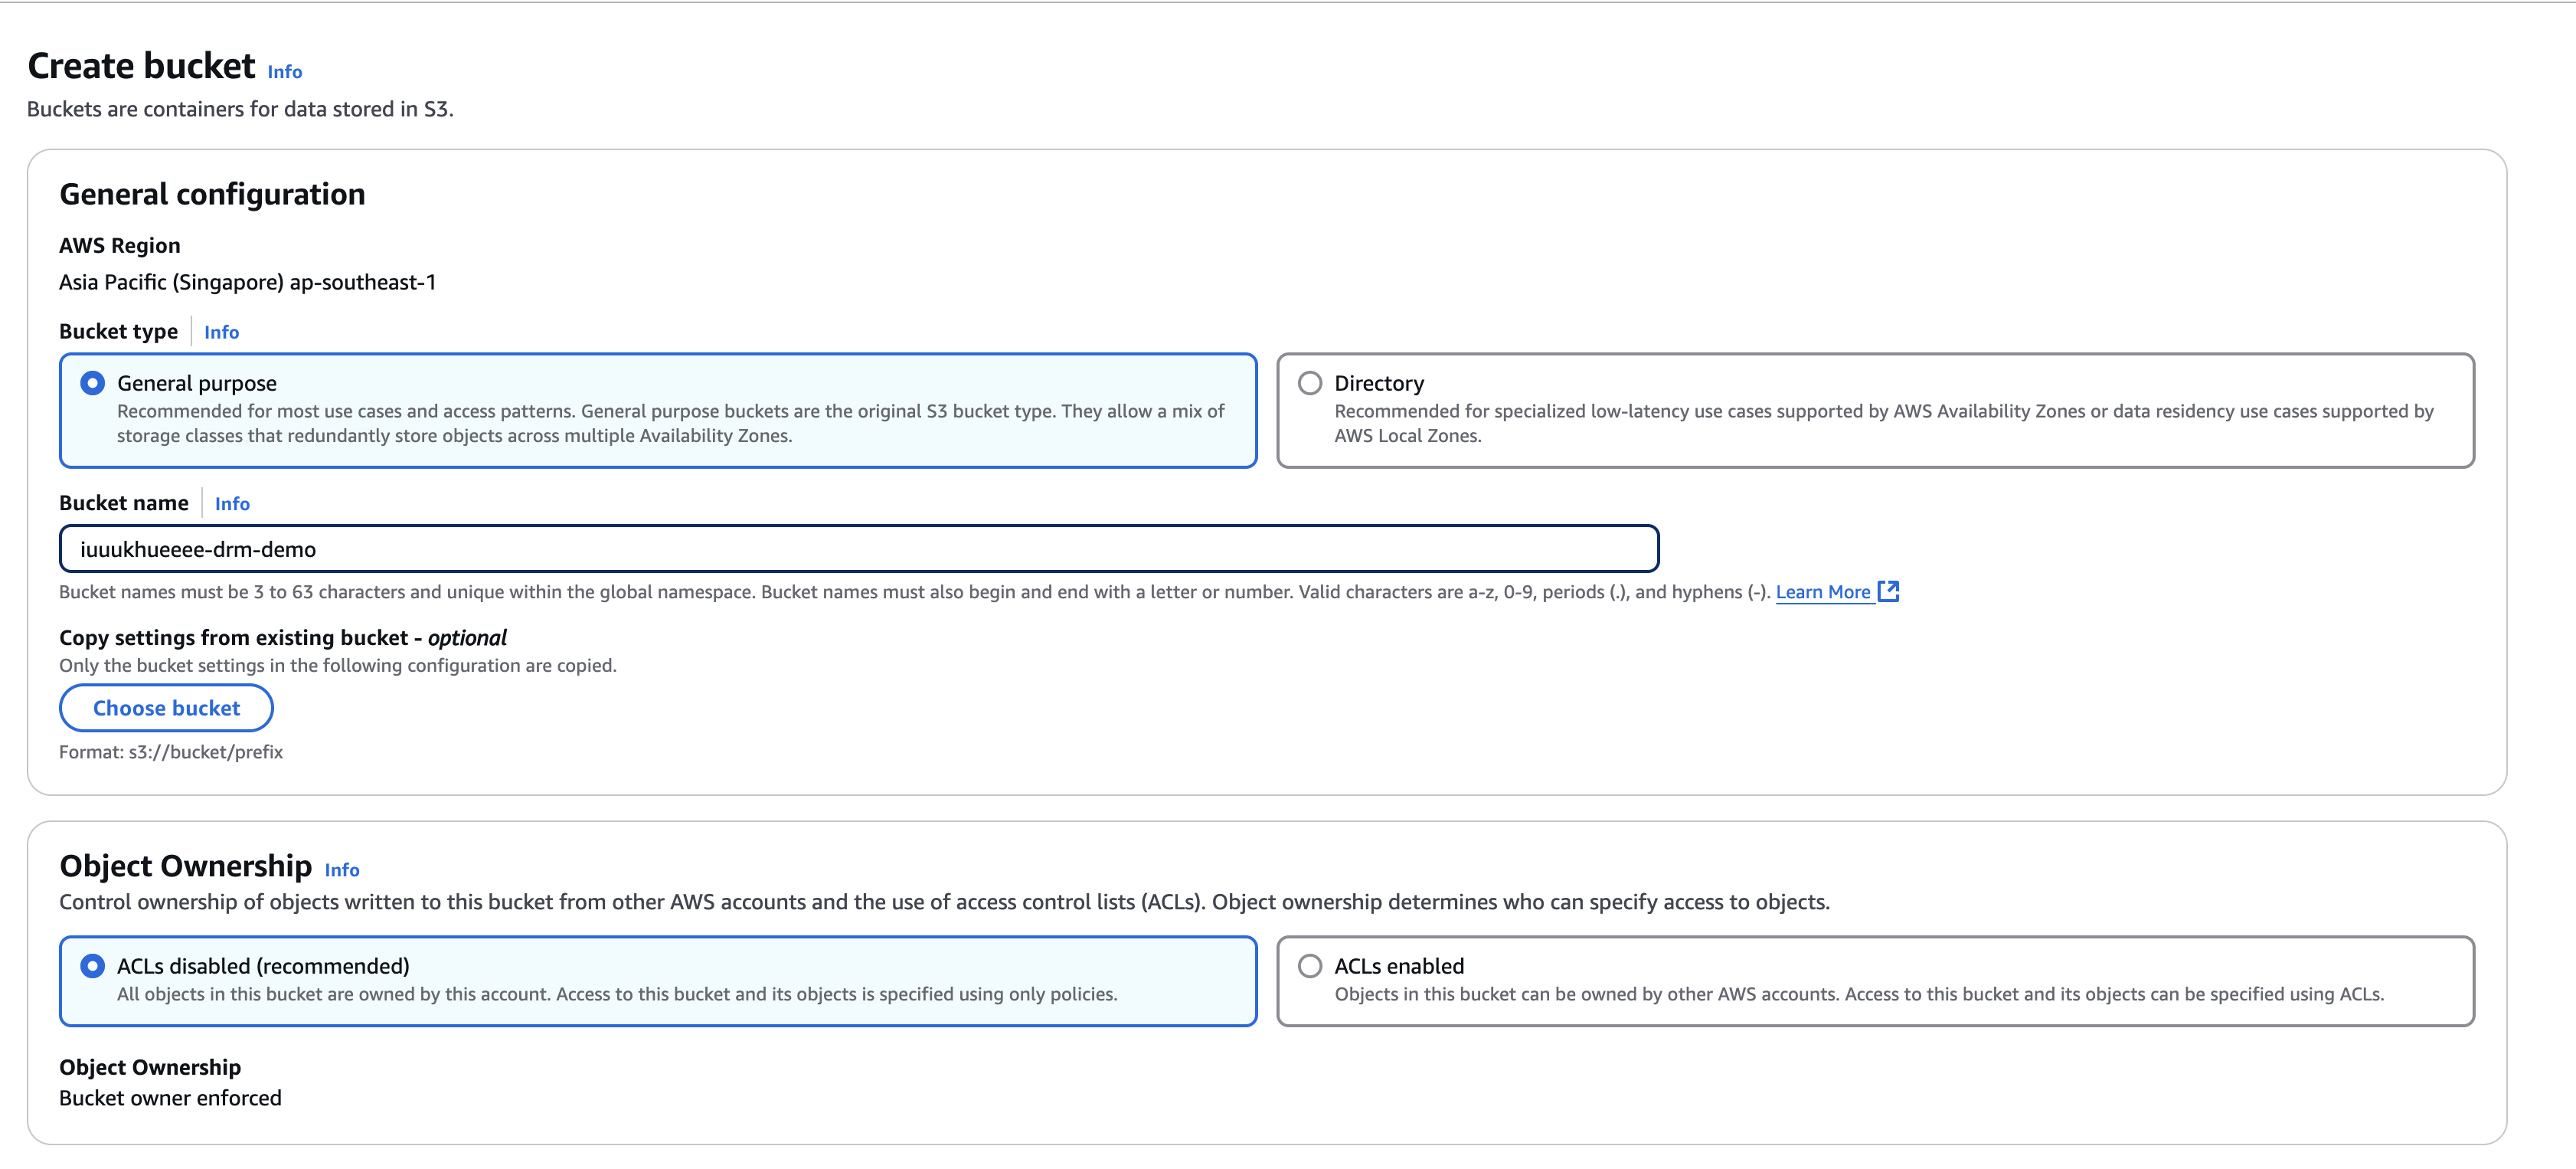
Step 3: Upload output video to S3 and setup static website
Login to S3 console and click Create bucket
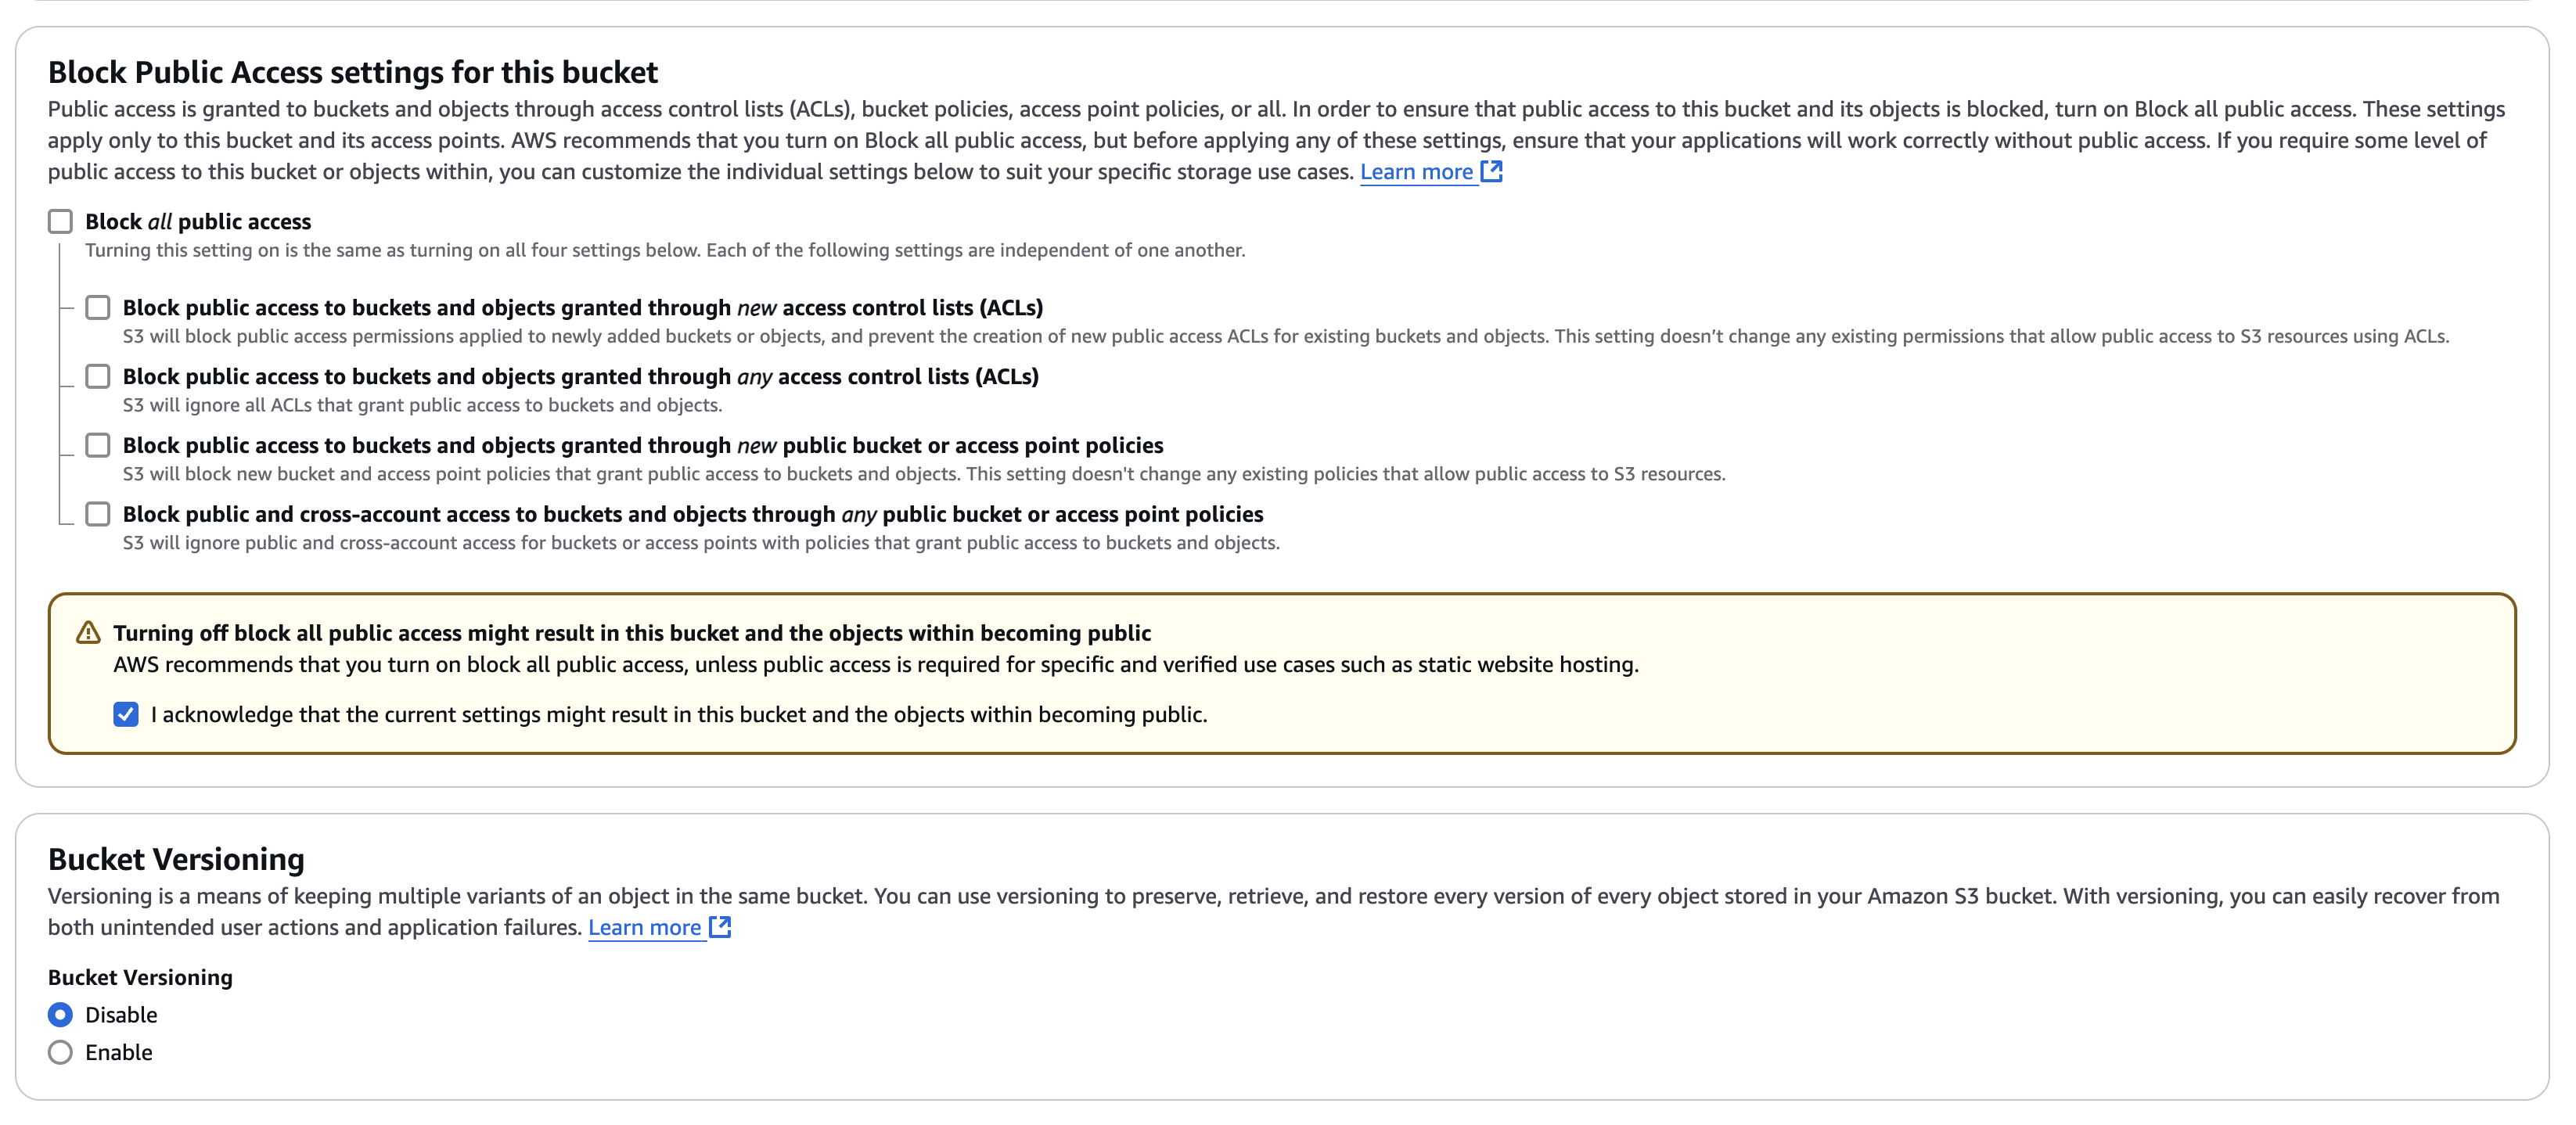
Leave everything the same, except for Block Public Access settings for this bucket since we will make this S3 bucket to host a static website.
Then upload all output files run by the packager
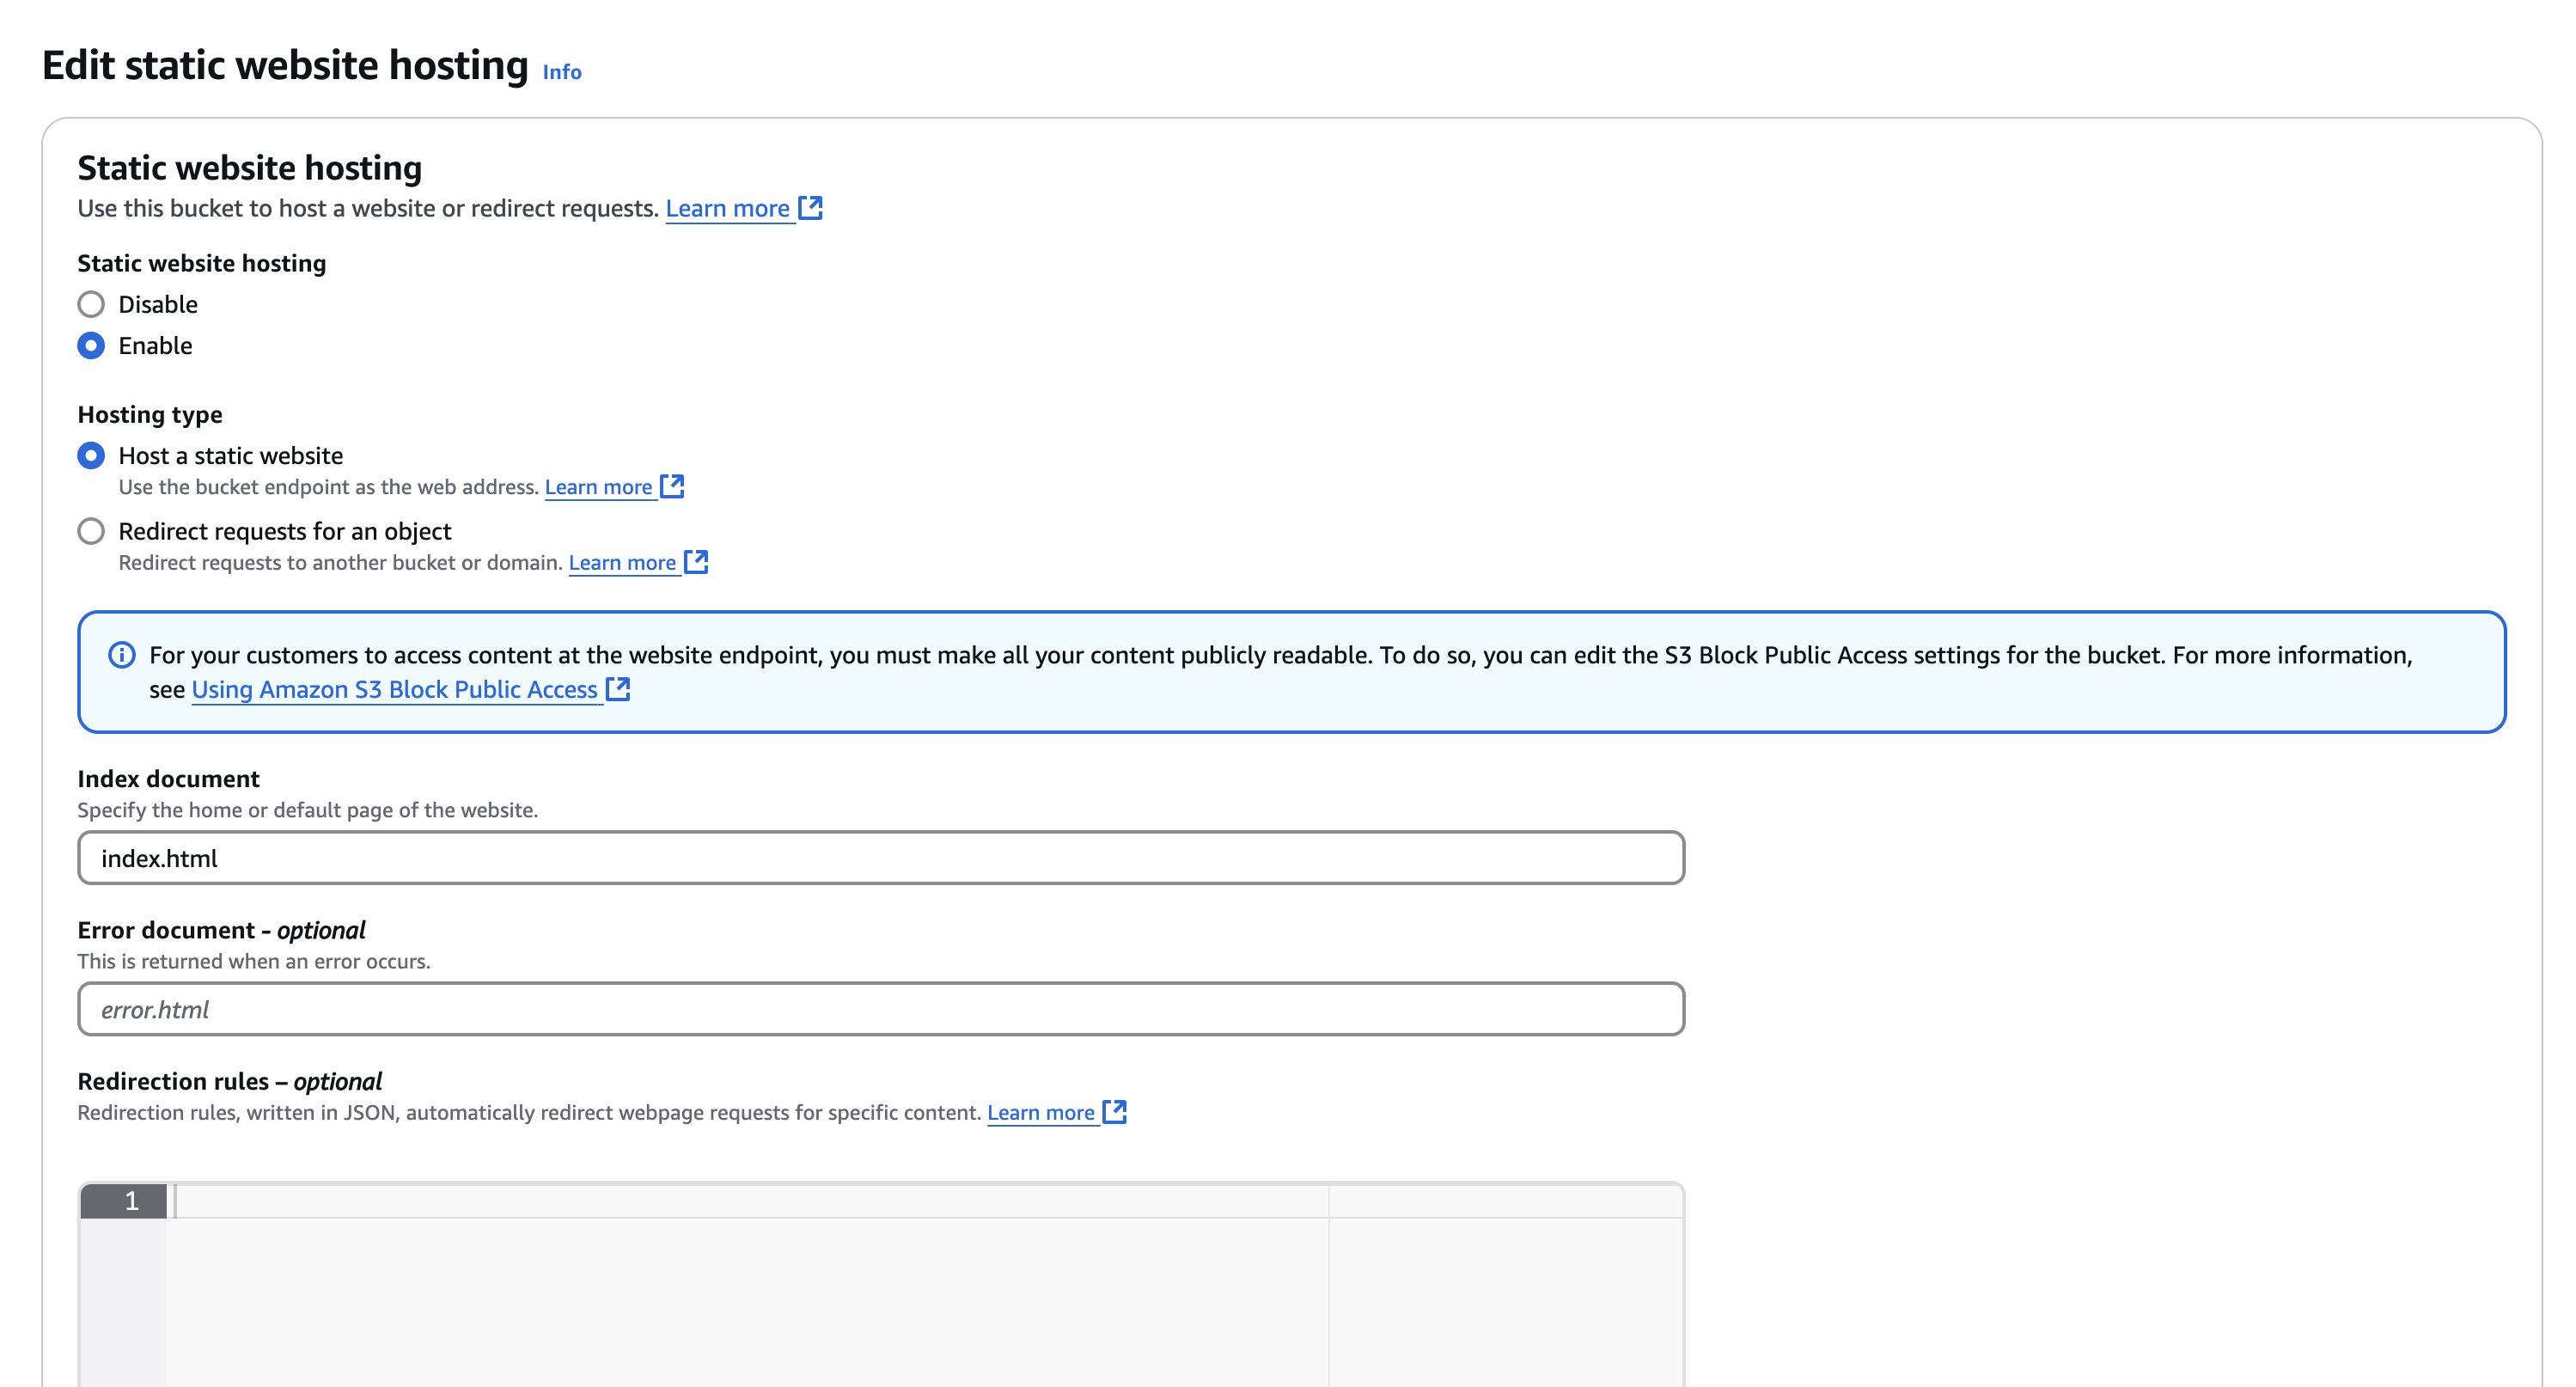
Then make this S3 host a static website by going to Properties -> Static website hosting -> Edit, and make changes as follows.
We don't have index.html yet, we will update it later. Right now just fill in to create a static website.
After setting up you'll have a Bucket website endpoint. eg: http://iuuukhueeee-drm-demo.s3-website-ap-southeast-1.amazonaws.com
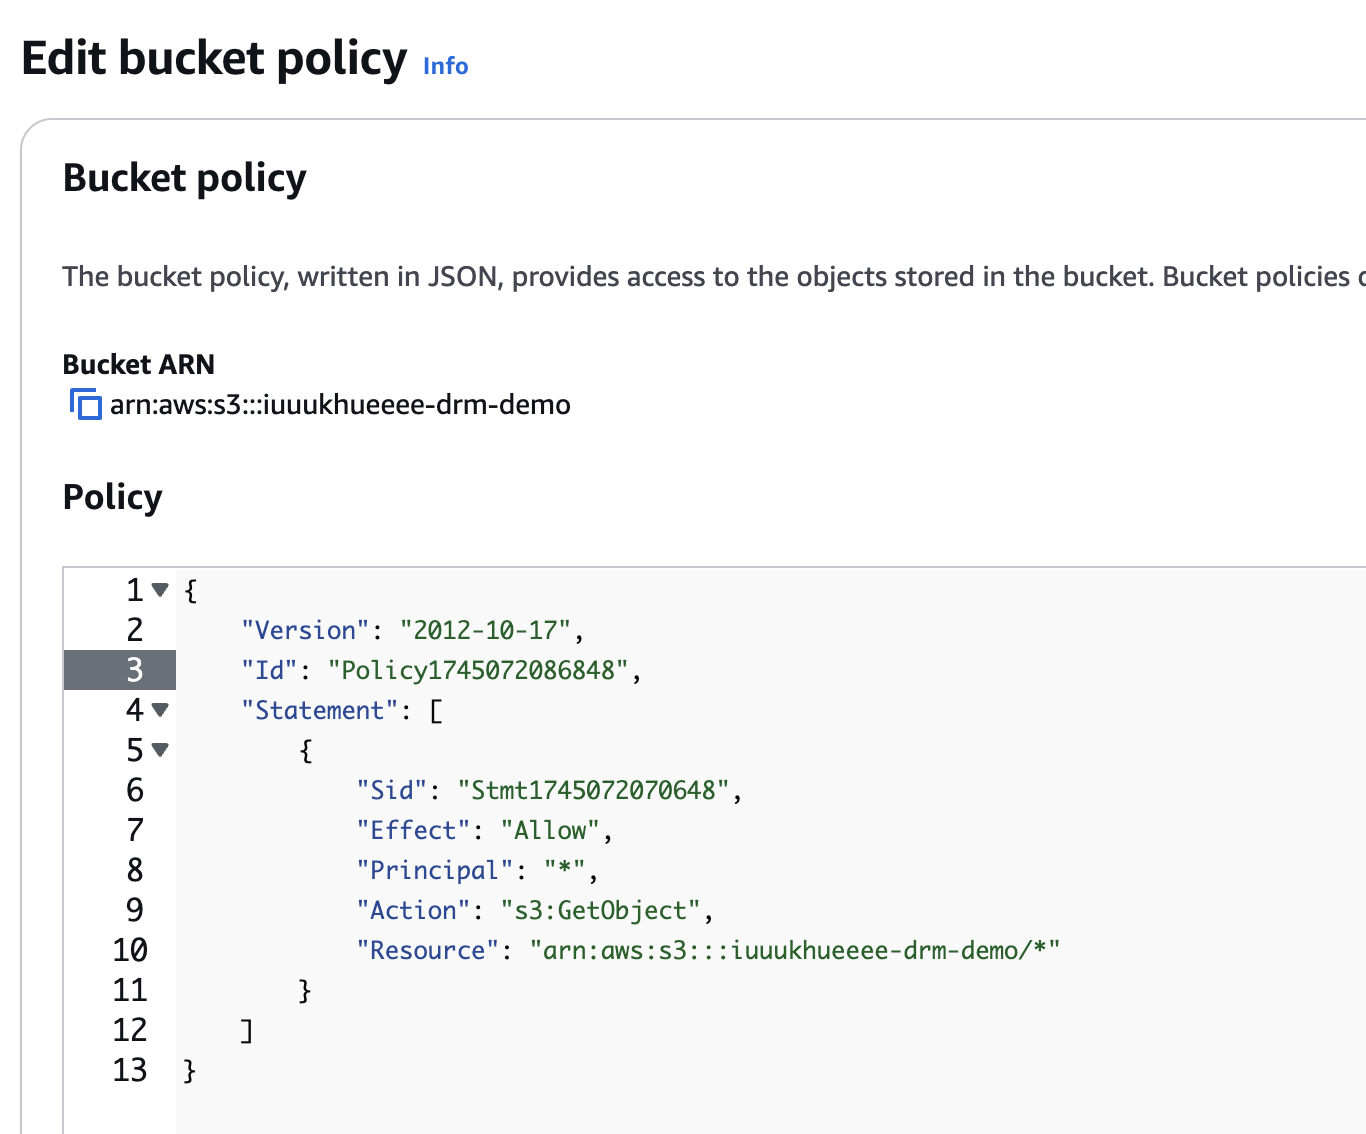
After that, go to Permissions -> Bucket policy -> Edit -> Policy Generator, and do as follow
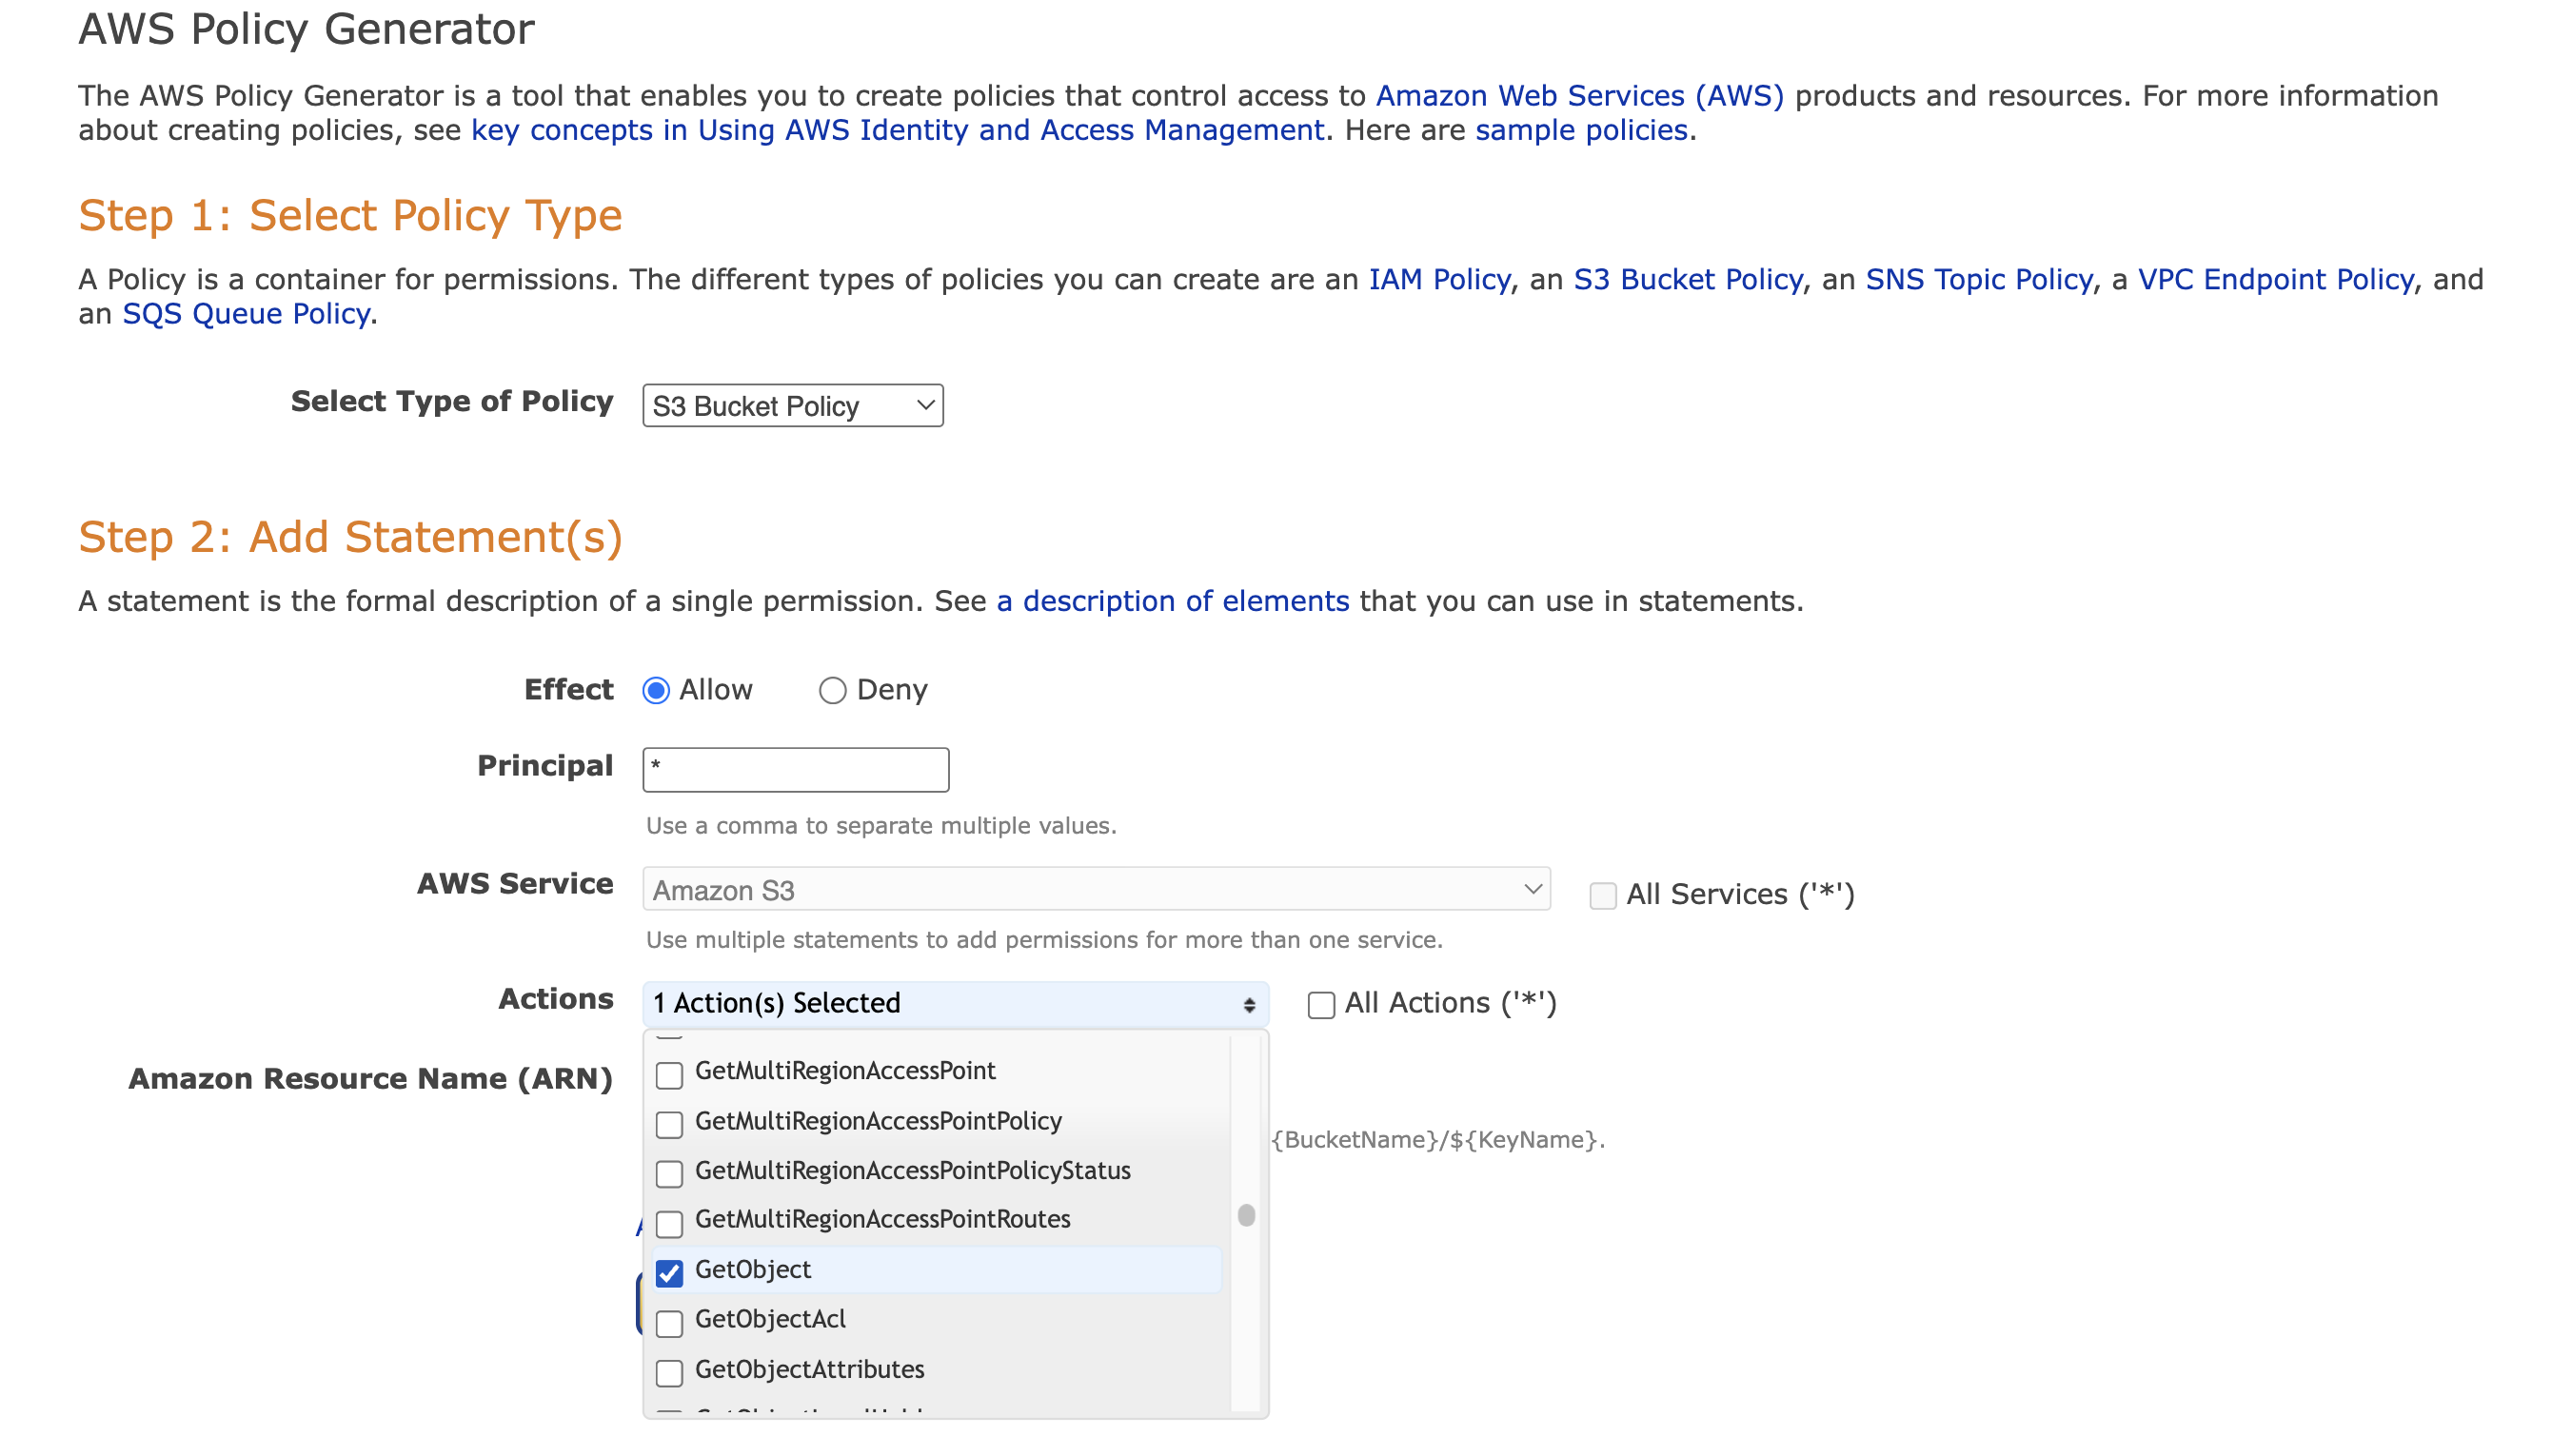
For Amazon Resource Name (ARN) paste in your S3 ARN. Then click Add Statement -> Generate Policy. Copy the generated policy and paste to policy window then click Save. Remember to have '/*' at the end of Resource
Now we can verify the web by making a request to http://iuuukhueeee-drm-demo.s3-website-ap-southeast-1.amazonaws.com/h264.mpd. Spoiler alert, it worked.
Now let's update the CORS, at the bottom of the screen, you'll see the CORS settings.
[
    {
        "AllowedHeaders": [
            "*"
        ],
        "AllowedMethods": [
            "GET"
        ],
        "AllowedOrigins": [
            "*"
        ],
        "ExposeHeaders": []
    }
]
The json above said we're allowing anywhere in the world to make a request to our S3. This sounds a bit odd because we're opening to the world. Yes, it is. This is not security and I do not recommend doing this. This is only for demo purpose.
Step 4: Configure CloudFront
CloudFront is used to serve the video content over HTTPS (S3 only serve HTTP). HTTPS is essential because secure communication is required when the Shaka Player contacts the Widevine license server to obtain decryption keys.
Go to Cloudfront -> Create distribution
Origin domain -> Select your newly created S3 that host the DRM video. If a dialog box appears suggesting to use website endpoint. Click Use website endpoint.
For Web Application Firewall (WAF) because this is a simple demo, I will not enable security protections. Then click on Create distribution. The setup will looks like this

Step 5: Make an app
While the Cloudfront is deploying, let's create our app.
I'll use Vite to create a React app. You can use other libraries like Angular or Vue, but the principle stay the same.
yarn create vite react-demo --template react
cd react-demo
yarn
Inside the index.html. I'll add Shaka Player
<!DOCTYPE html>
<html lang="en">
  <head>
    <meta charset="UTF-8" />
    <link rel="icon" type="image/svg+xml" href="/vite.svg" />
    <meta name="viewport" content="width=device-width, initial-scale=1.0" />
    <!-- Shaka Player compiled library: -->
    <script src="https://cdnjs.cloudflare.com/ajax/libs/shaka-player/4.11.7/shaka-player.compiled.js"></script>
    <title>Vite + React</title>
  </head>
  <body>
    <!-- The player -->
    <video
      id="video"
      width="640"
      poster="//shaka-player-demo.appspot.com/assets/poster.jpg"
      controls
      autoplay
    ></video>

    <div id="root"></div>
    <script type="module" src="/src/main.jsx"></script>
  </body>
</html>
Next, let's modify the App.jsx inside the src/ folder.
import { useEffect } from "react";

function App() {
  useEffect(() => {
    // Update your own Cloudfront URL here!!
    const manifestUri = "YOUR_CLOUDFRONT_URL/h264.mpd"; // Replace with your actual CloudFront URL.

    const licenseServer = "https://cwip-shaka-proxy.appspot.com/no_auth";

    function initApp() {
      // Install built-in polyfills to patch browser incompatibilities.
      shaka.polyfill.installAll();
      // Check to see if the browssr supports the basic APIs Shaka needs.
      if (shaka.Player.isBrowserSupported()) {
        // Everything looks good!
        initPlayer();
      } else {
        // This browser does not have the minimum set of APIs we need.
        console.error("Browser not supported!");
      }
    }

    async function initPlayer() {
      // Create a Player instance.
      const video = document.getElementById("video");
      const player = new shaka.Player();
      player.configure({
        drm: {
          servers: {
            "com.widevine.alpha": licenseServer,
          },
        },
      });

      await player.attach(video);

      // Attach player to the window to make it easy to access in the JS console.
      window.player = player;

      // Listen for error events.
      player.addEventListener("error", onErrorEvent);

      // Try to load a manifest.
      // This is an asynchronous process.
      try {
        await player.load(manifestUri);
        // This runs if the asynchronous load is successful.
        console.log("The video has now been loaded!");
      } catch (e) {
        // onError is executed if the asynchronous load fails.
        onError(e);
      }
    }

    function onErrorEvent(event) {
      // Extract the shaka.util.Error object from the event.
      onError(event.detail);
    }

    function onError(error) {
      // Log the error.
      console.error("Error code", error.code, "object", error);
    }

    initApp();
  }, []);

  return null;
}

export default App;
This example is taken from:
- https://shaka-player-demo.appspot.com/docs/api/tutorial-basic-usage.html
- https://shaka-player-demo.appspot.com/docs/api/tutorial-license-server-auth.html
Then we can build our app
yarn build
The output files will store in dist/ folder.
Step 6: Upload the app to S3
Go to the S3 bucket and click on Upload
Select Add files and select those two files
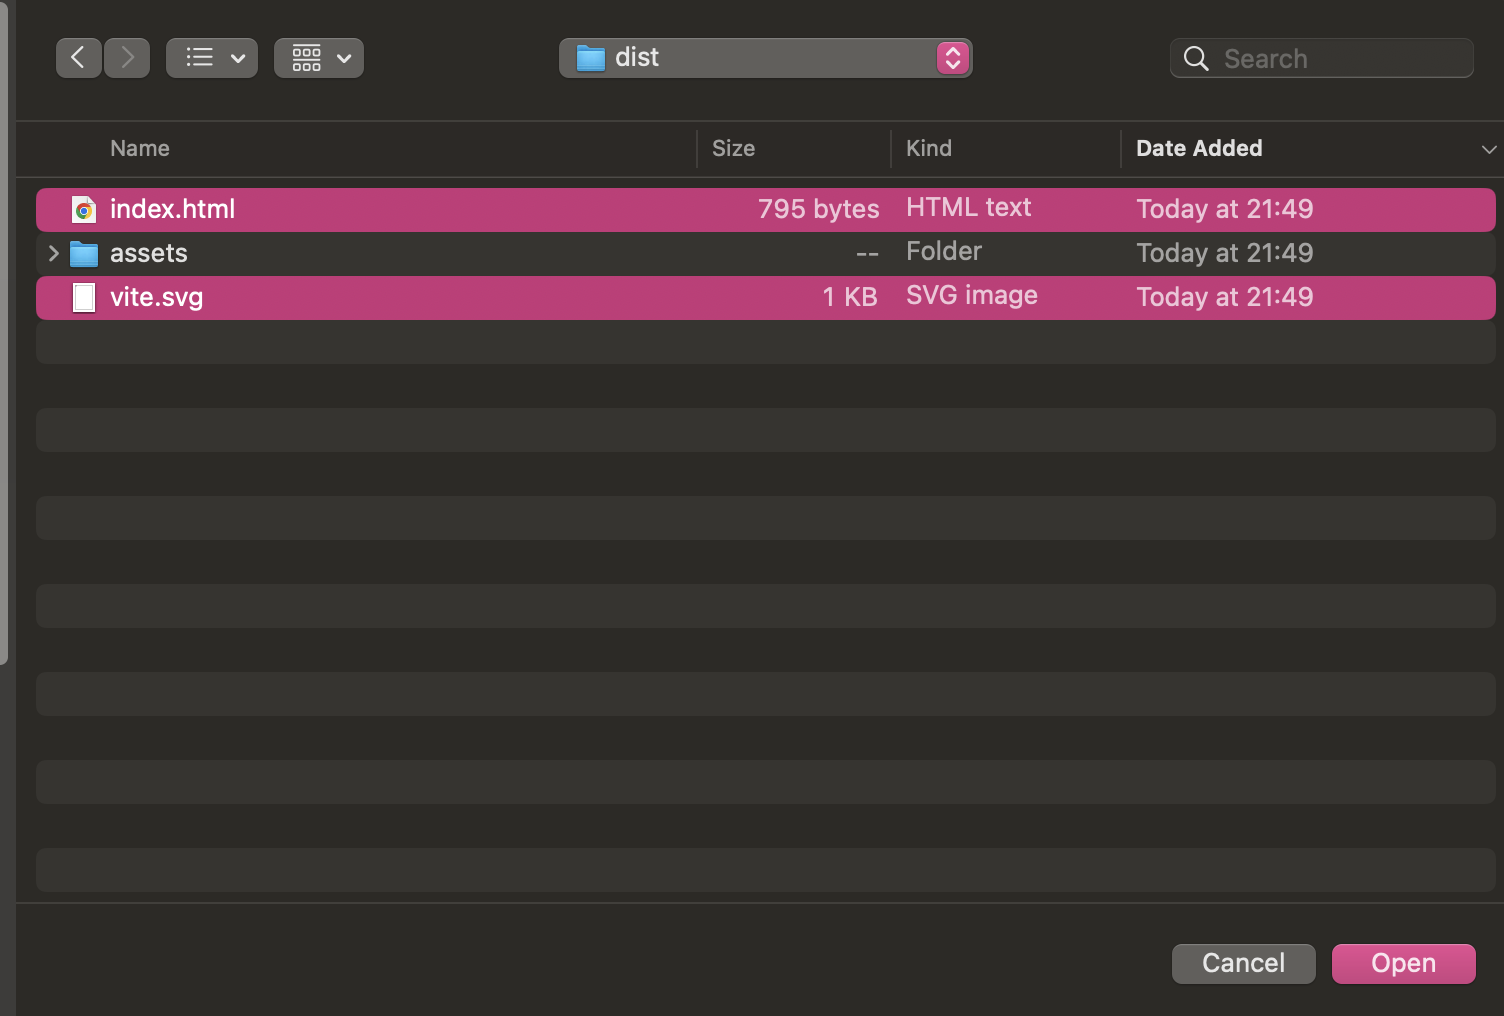
Select Add folder and select the assets folder.
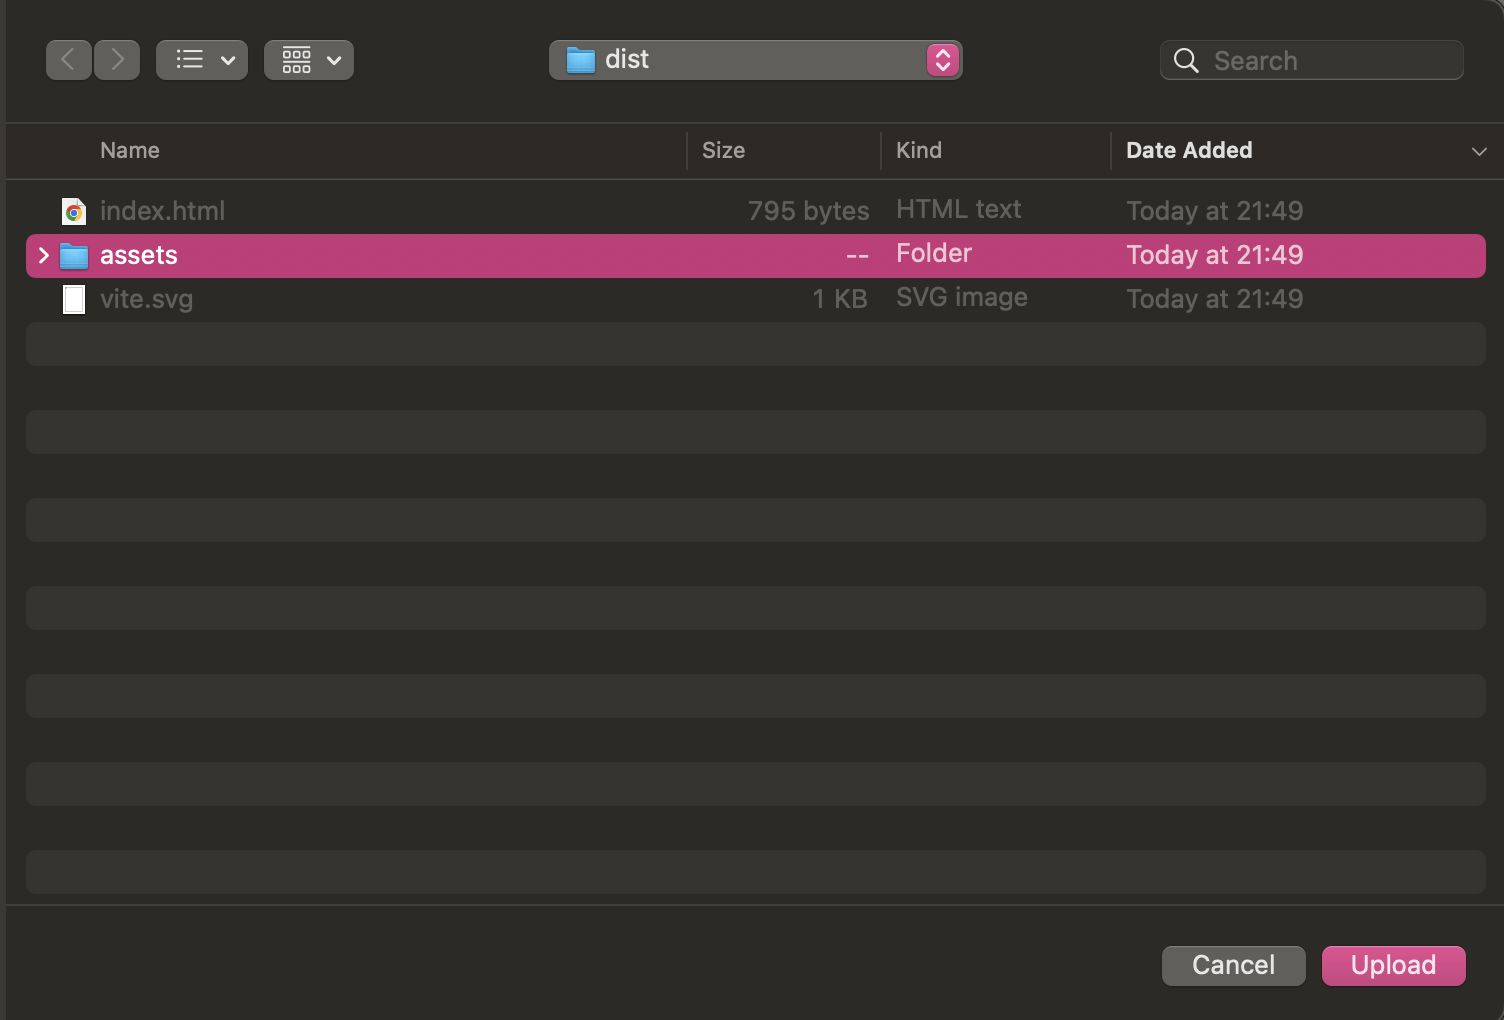
It will look like this

Then click Upload.
The S3 will look like this:
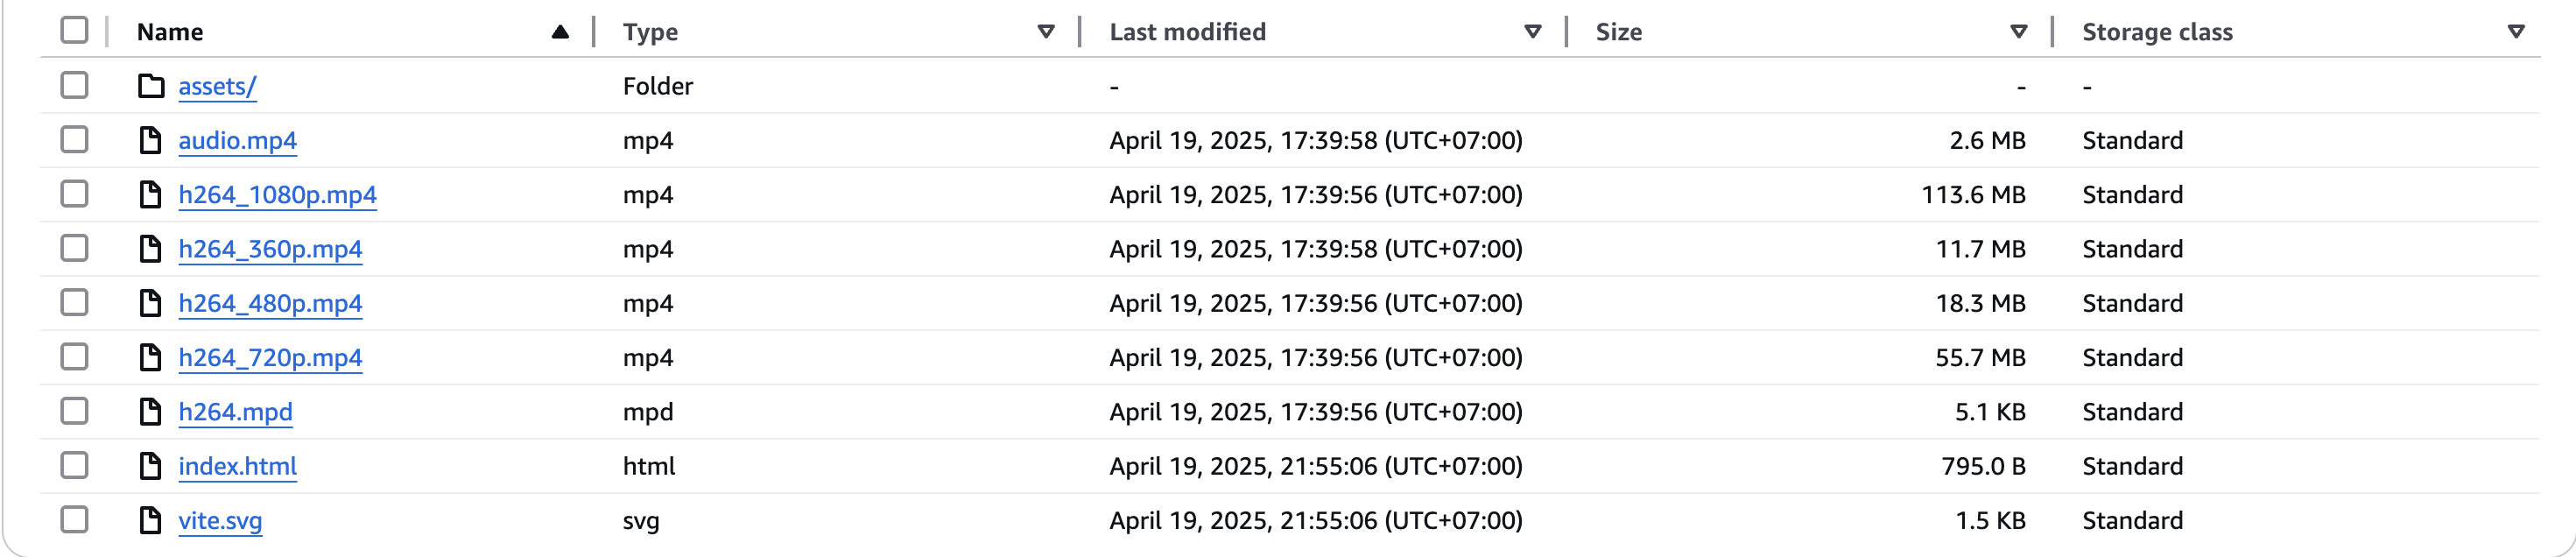
Result
Now the Cloudfront must be deployed. Let's test it shall we? The player shown up. We can test the feature by playing the video and screenshot it, it will be blank.

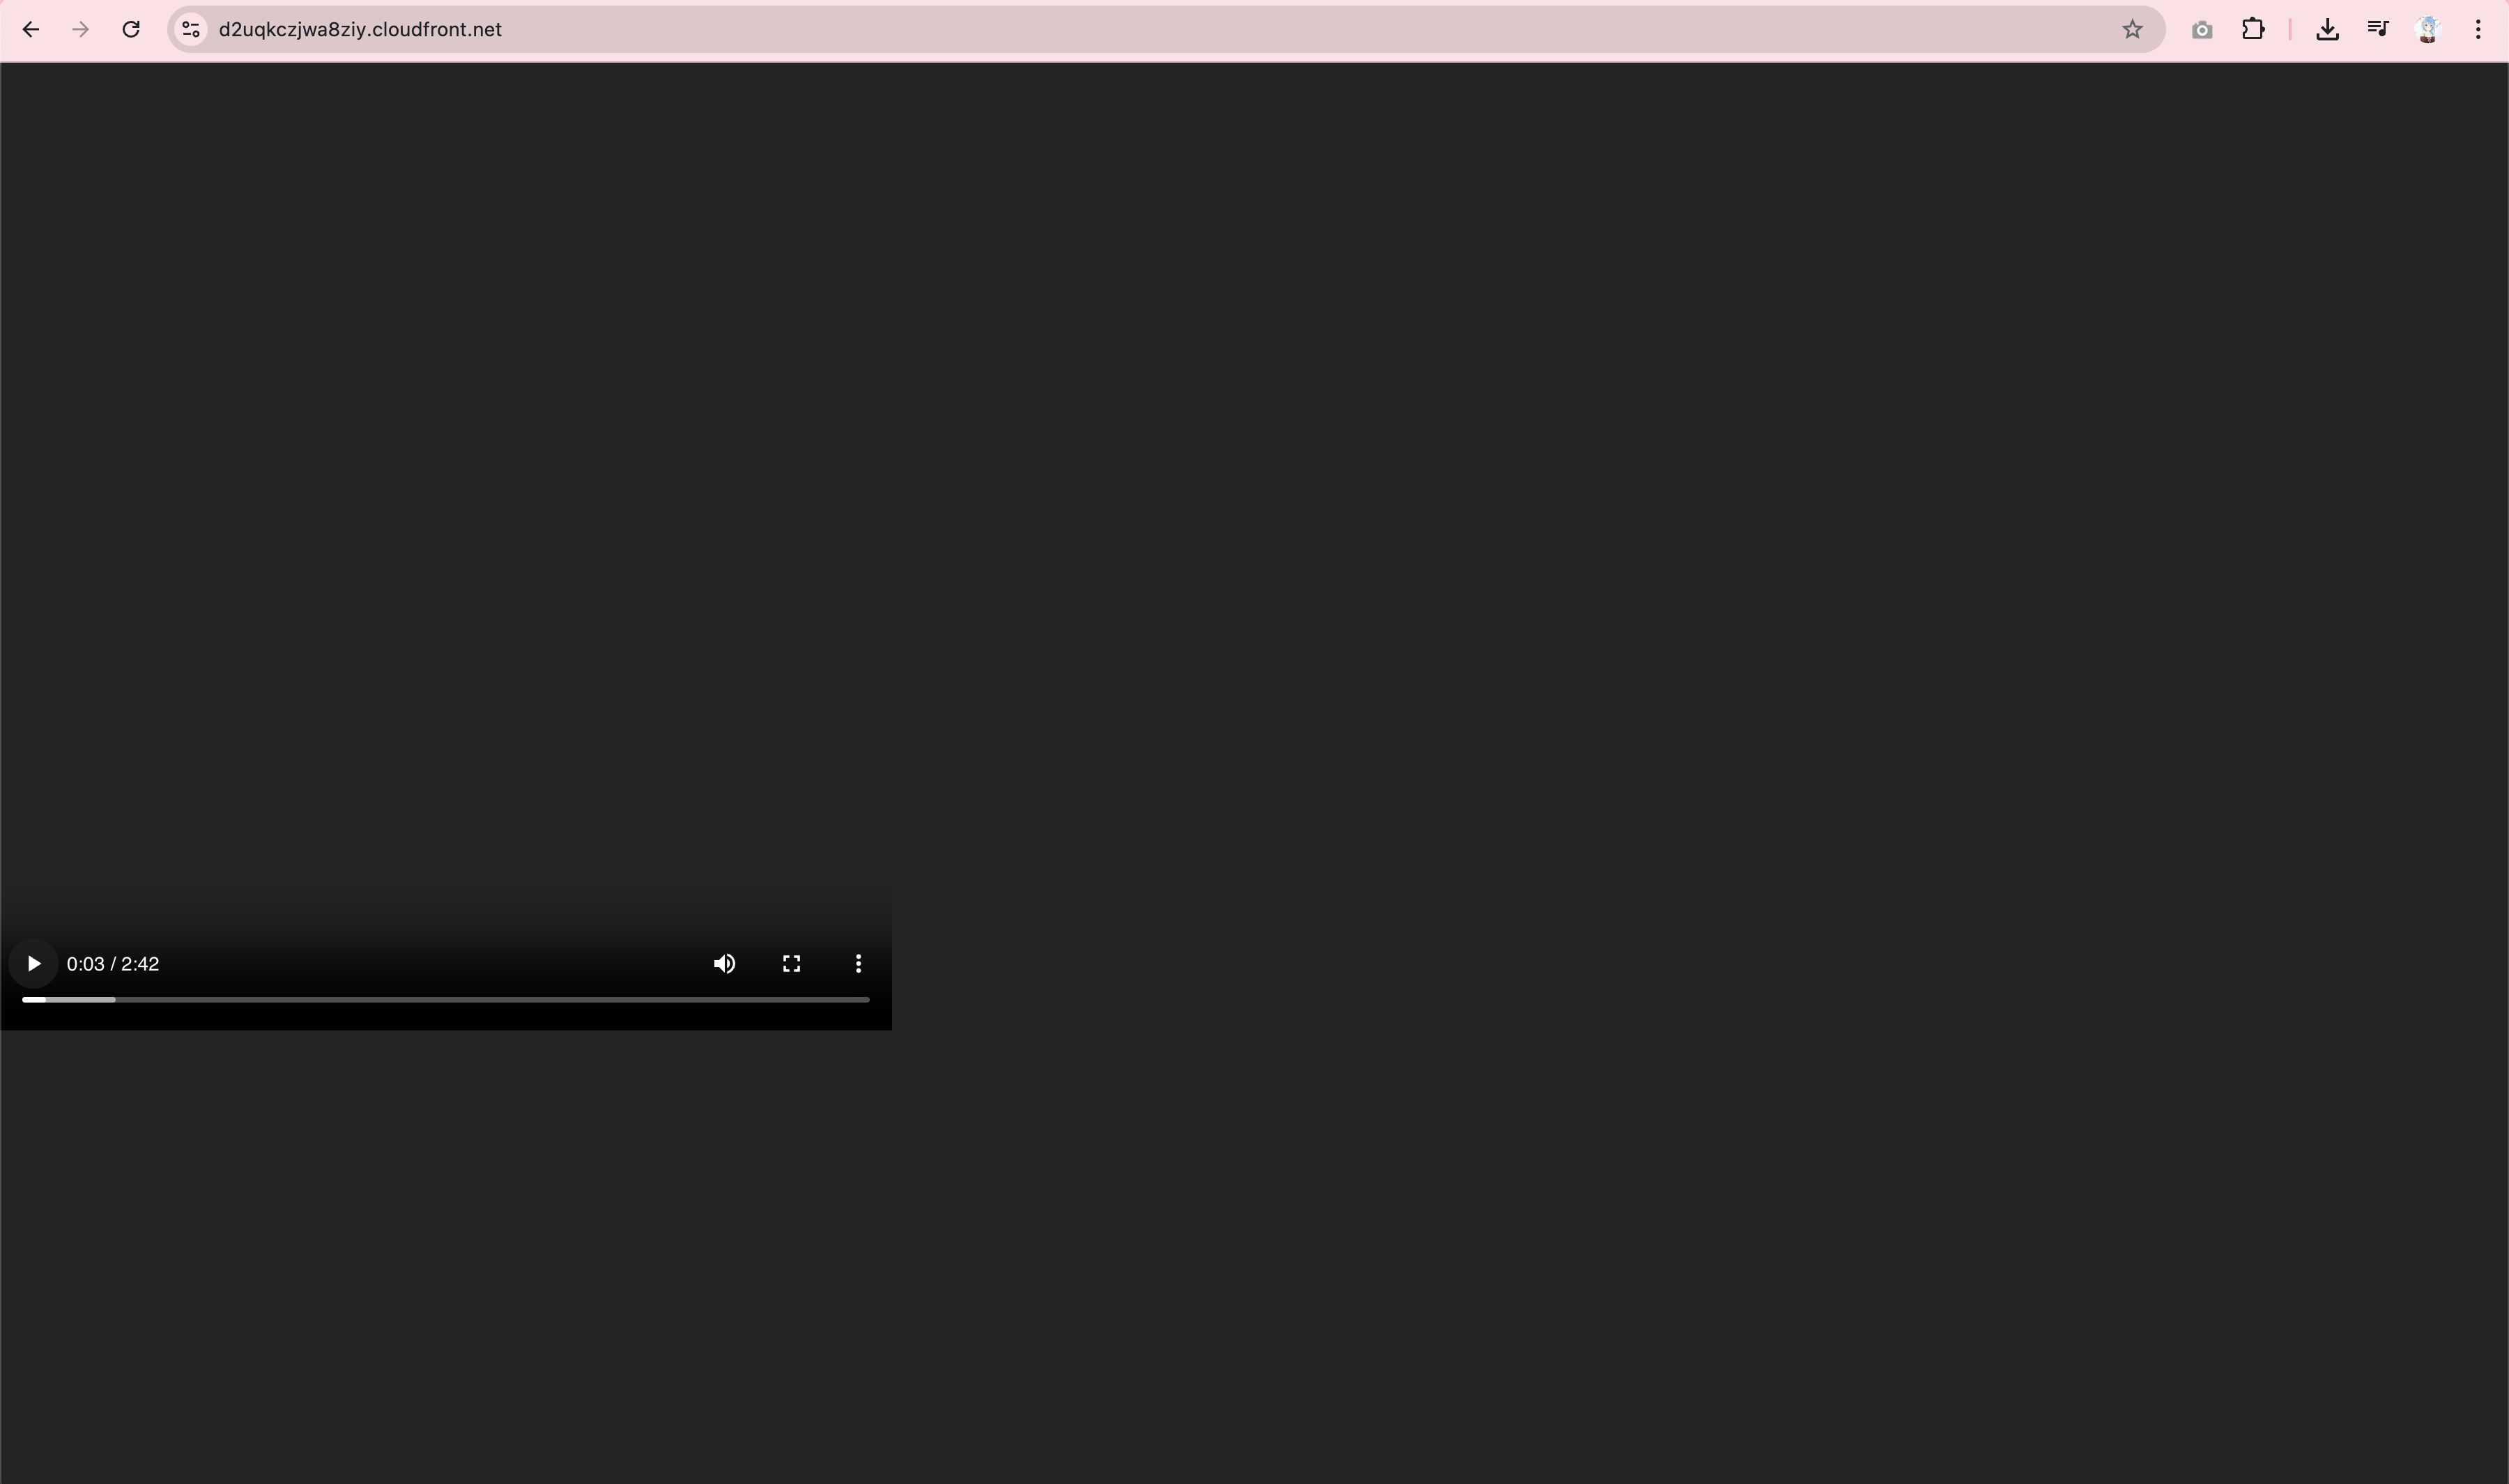
You can give it a try for yourself. https://d2uqkczjwa8ziy.cloudfront.net
Important Note about DRM License Servers:
The packager command in this tutorial uses a test Widevine license server URL: https://license.uat.widevine.com/cenc/getcontentkey/widevine_test.
This is a TEST server provided by Widevine for development and testing purposes ONLY. It is not secure and should NOT be used for production DRM deployments.
In a real-world DRM system, you would need to integrate with a commercial DRM license server. These servers are responsible for:
- Authentication: Verifying that the user or device requesting a license is authorized to access the content. This often involves user logins, token validation, or device verification.
- Authorization: Determining if the authenticated user is entitled to view the specific video content.
- License Issuance: Securely delivering decryption keys to the player (like Shaka Player) only if authentication and authorization are successful. The license also contains usage rules (e.g., playback duration, output protection levels).
To learn more about production Widevine DRM and license server integration, you should consult the official Widevine documentation and contact Widevine or a DRM solution provider.